
Patching Drywall: When It's a Simple Fix and When It Signals a Bigger Problem
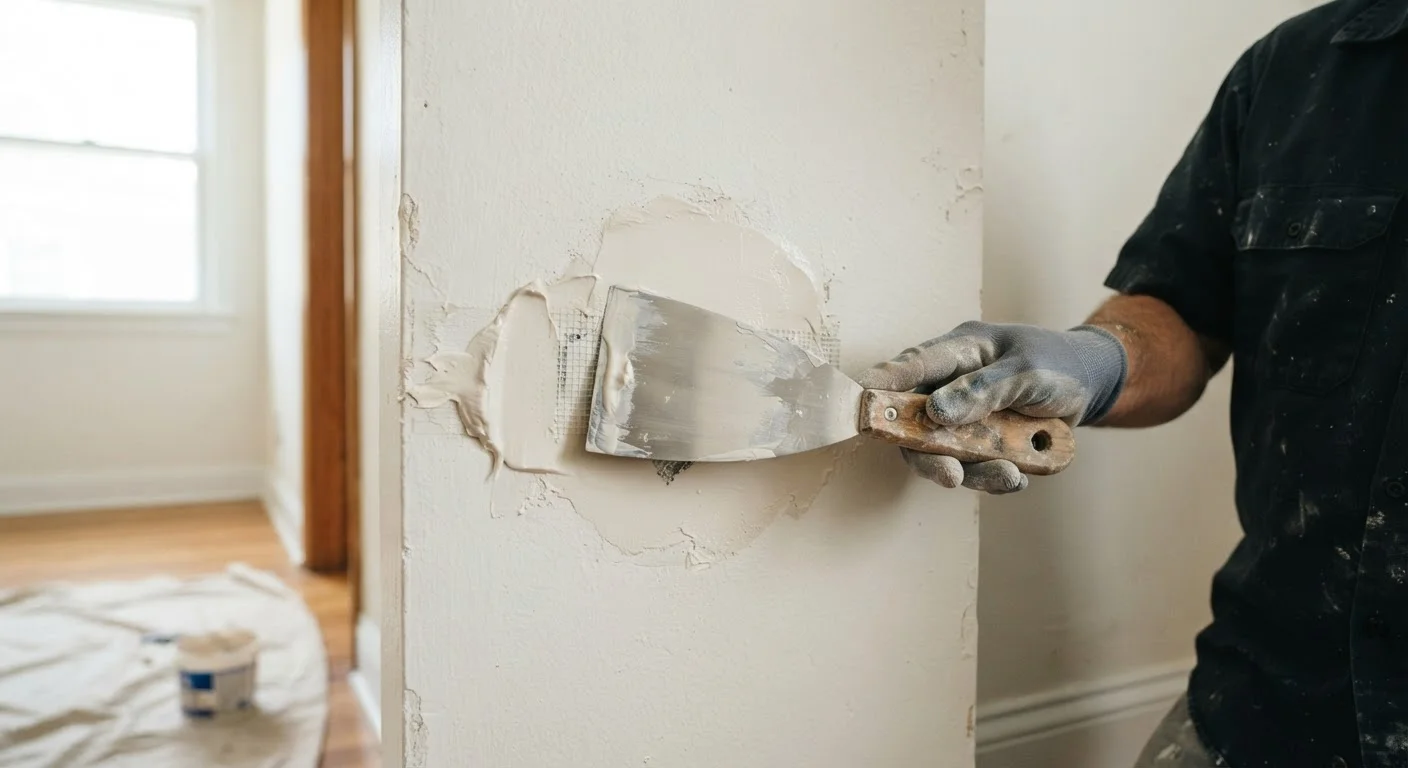
Photo credit: TurboBlogs.net | Explore Blogs At Turbo Speed
Not every crack or hole in drywall is equal. Learn to tell routine cosmetic damage from signs of structural or moisture issues behind the wall.
Key Takeaways
- Small nail holes and minor dings are routine cosmetic repairs any homeowner can handle in under an hour.
- Cracks that are wide, diagonal, or growing over time may indicate foundation or structural movement - not just settling.
- Soft, discolored, or bulging drywall almost always signals a moisture problem that must be addressed before patching.
- Skipping the root cause and patching over serious damage only delays - and worsens - the eventual repair bill.
- When in doubt, consult a licensed contractor or structural engineer before attempting DIY repairs.
Reading the Damage: Cosmetic Versus Consequential
Not all drywall damage is created equal, and misreading it is one of the most common - and costly - homeowner mistakes. Routine wear produces predictable, manageable damage: nail pops (fasteners backing slightly out of the wall), small holes from hardware or doorknobs, and hairline cracks along seams from seasonal expansion and contraction. These are cosmetic issues. They do not affect the structural integrity of the wall or the home, and they respond well to straightforward patching techniques.
More serious damage tells a different story. Cracks that are wider than roughly an eighth of an inch, diagonal cracks radiating from the corners of windows and doors, or cracks that reappear after being patched are warning signs worth investigating. So is drywall that appears to bulge outward, feels soft, or shows water staining. These patterns can indicate ongoing foundation movement, framing issues, or hidden moisture - problems where patching the surface does nothing to address the underlying cause. For a closer look at how to interpret crack patterns specifically, see our guide What That Crack in Your Wall Is Actually Telling You.
Diagonal or Stair-Step Cracks Warrant Professional Review
Diagonal cracks running at 45-degree angles from door or window corners, or stair-step cracks following mortar joints in masonry, can indicate foundation movement or soil settlement. These are not cosmetic issues. Do not simply patch them - consult a licensed structural engineer or foundation specialist to determine whether the movement is ongoing before proceeding with any repairs.
Building a habit of inspecting your walls seasonally - especially after winter and after heavy rains - makes it far easier to catch small problems before they grow. This kind of proactive attention is a cornerstone of any effective maintenance routine, as outlined in The Anatomy of a Home Maintenance Schedule.
How to Patch Drywall: Step-by-Step
The following steps apply to routine cosmetic repairs - nail holes, small impact holes up to a few inches in diameter, and stable, non-recurring cracks. Gather your materials before you begin.
Putty knife or drywall knife
Used to apply and feather joint compound smoothly over the damaged area.
Sandpaper (120- and 220-grit)
Smooths dried joint compound between coats and before painting.
Joint compound (all-purpose or lightweight)
The primary filler used to rebuild the wall surface over holes and cracks.
Drywall mesh patch or backer board
Provides structural support for holes larger than approximately half an inch in diameter.
Drywall primer
Seals the porous patched surface so finish paint applies evenly.
Flashlight or work light
Helps reveal surface irregularities and assess the depth or extent of damage.
What you will need
Assess the Damage Before Reaching for Compound
Before purchasing any materials, examine the damage carefully. Press gently around the affected area - drywall should feel solid and rigid. Soft, spongy, or crumbling gypsum suggests moisture infiltration. Look for discoloration (yellow or brown staining), bubbling paint, or a musty smell nearby. Check the wall surface under raking light (a flashlight held at a low angle) to reveal depth and extent of damage. Small holes left by nails or screws, minor dings, and hairline cracks from normal settling are straightforward DIY repairs. Anything beyond this warrants further investigation before you proceed.
Clean and Prepare the Damaged Area
For nail holes and small dings, use a putty knife to scrape away any loose paint or gypsum flaking around the edge. For larger holes, cut away any torn or dangling drywall paper using a utility knife - uneven edges will show through the finished patch. Wipe the area with a dry cloth to remove dust. If the hole is larger than about half an inch across, you will need a mesh patch or a backer board to bridge the gap before applying compound.
Apply the First Coat of Joint Compound
For nail holes, press a small amount of lightweight joint compound into the hole using your putty knife and smooth it flush with the wall surface. For larger repairs, press self-adhesive mesh over the hole first, then apply compound in a thin layer that extends several inches beyond the patch edges using broad, feathering strokes. Feathering - gradually thinning the compound outward from the center - prevents hard ridges that show through paint. Allow this first coat to dry completely according to product instructions, typically 24 hours at room temperature.
Sand, Then Apply a Second Coat
Once the first coat is fully dry (it will turn uniformly white with no gray wet spots), sand lightly with 120-grit sandpaper. You are not trying to flatten the repair completely yet - just knock down ridges and high spots. Wipe away dust with a dry cloth. Apply a second, thinner coat of compound, again feathering the edges outward. Many patches require two to three coats for a smooth, invisible result. Each coat should be slightly wider than the previous one to blend into the surrounding wall.
Final Sanding and Priming
After the final coat dries, sand the area smooth with 220-grit sandpaper, using a light circular motion. Run your hand across the surface - it should feel continuous with the surrounding wall. Apply drywall primer to the patched area and allow it to dry before painting. Match the existing wall texture before priming if your walls have a stippled or orange-peel finish; a light splatter with a texture spray or sponge technique can approximate common finishes.
Prime Before You Paint
Joint compound and patching materials are highly porous and will absorb paint unevenly, leaving a dull spot called 'flashing.' Always apply a coat of drywall primer to the patched area before painting, even if the patch blends in visually when dry. This ensures a uniform sheen that matches the surrounding wall.
Don't Patch Over Hidden Moisture or Mold
Covering drywall damage without identifying and eliminating the moisture source will allow mold to continue growing behind the new surface. Mold remediation - especially if it spreads to framing - is significantly more expensive and disruptive than catching it early. If you see staining, smell musty odors, or find soft or crumbling gypsum, investigate the source before applying any patching compound.
Once the repair is complete and painted, monitor the area over the following weeks. If cracks return or the patch separates from the wall, that is a signal to investigate further rather than simply re-patch. As our editorial team explains in Why Deferred Maintenance Costs More Than You Think, repeatedly addressing symptoms without resolving causes compounds costs significantly over time.
For a broader look at how to weigh the decision to repair yourself versus hiring a professional - including the real risks involved in either path - see DIY Home Repairs: The Honest Case For and Against Doing It Yourself.

Author
Home & Real Estate Editorial Team
Home & Real Estate Editorial Team is the collective byline for our editorial team and contributor network. Articles published under this byline or an editorial pen name are researched, written, and reviewed according to our editorial standards for clarity, consistency, and independence before publication.
View all articles →